Date posted: July 3, 2010
- Types of LEDS and Power Sources
- LED Characteristics and The Simple LED Circuit
- More Series LED Circuits
- Parallel LED Circuits
- LED Circuit Tools and LED Strip Kits
- Wiring Standard Bulb LEDs
- SMD LED Circuit Wiring
- LED Wiring and Current Check for Battery Power
- Placing your LED circuits on your RC Craft
- Remote Controlling your LED Circuit
- Painting With Flight
– Download Types of LEDS and Power Sources as PDF –
Welcome to the first article and video in our LED Night Flying Series! I hope you find the series educational and entertaining as we build up our Combat! Delta Wing flyer for some smooth carnage-free night flying. Vinnie Hoverino joins our team as he helps introduce all of the electronics jargon and simple direct current LED circuits.
Ever wonder what your goals are with a hobby? Are you looking to tick-tock your helicopter, fly it inverted and flip it around like a gnat on crack? Flying your plane inverted a foot from the ground? Perhaps taking video from your flight, or controlling it from a set of video goggles?
As for the flying bits, I’m not interested in a lot of 3D maneuvers or high speed fly bys…. For now. I’ve enjoyed taking a holistic approach to RC. From the transmitters, to the circuits, to the motors, and even the bits of flying I do. I’m an amateur dabbler and tinkerer. Instead of the ten year old kid taking apart LCD watches and messing around with those 300-in-1 electronics labs, I’m now a thirty-something taking apart electric airplanes and helicopters, and still playing around with those 300-in-1 electronics labs. By no means am I an expert – just the aforementioned dabbler.
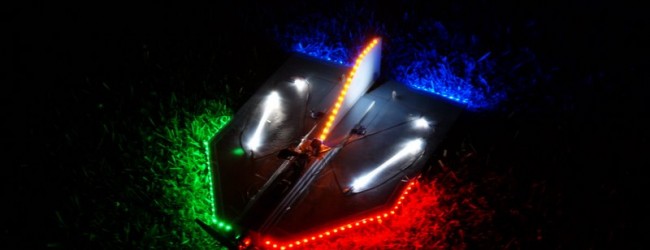
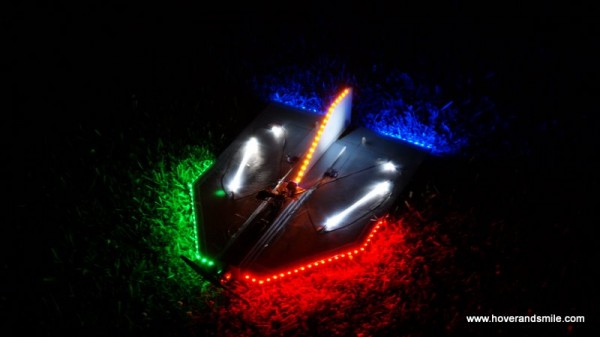
So, recently I started taking some of my LEDs and attaching them to my RC craft. From home-made albeit somewhat risky helicopter night blades to IC 555 timer circuits to control blinking lights, I’ve now reached the point where I wanted to be able to take one of my combat fliers and completely light it up for night flying.
I did it… and plunged the little blue wonder straight into the ground. Total pilot error, not a loss of orientation from the lights. I went inverted and I was too low to pull a loop… I should have looped the other way. I pulled ‘down’ instead of ‘up’. Ah well, everything survived except the battery. Try, try again, as they say.
Alas, the experiment worked. I was able to fly at night, where we have a tendency to have some of our more calm periods of the day in Omaha, Nebraska. Chicago has nothing on us, I’m afraid. This is… a windy city. At dusk and dawn, however, there are occasionally some nice and calm moments…enough for Pops to take his Parkzone Vapor outside, and for me to continue sleeping past sunrise.
Well, I figured it might be a decent time to look at just a few options for adding some light action to your craft, and considerations for powering and controlling the lights.
A LED by any other name…
LEDs are perfect for lighting up your craft. Light, small, and bright. It’s peanut butter to your aircraft’s chocolate, eh? LED stands for Light Emitting Diode, and as the first two words are fairly obvious, the diode part may be a bit of a curve ball. The diode piece means that current is only allowed in one direction, and therefore have a forward and reverse notation. Diodes have plenty of other uses than lighting up RC planes, but we’ll borrow from Conan and just say that… is another story.
LEDs have improved much over the years, as evident from the availability of LEDflashlights, LED street lights, and other various lighting solutions that previously only old school incandescent light bulbs were only allowed to handle. I can’t say for sure whether or not there’s an incandescent light maker’s union, but I would imagine they’re feeling more threatened every passing year.
LED Types
Most of the LEDs you’ll encounter for RC lighting are your standard ‘bulbous’ types, the ones you find in a grab bag at Radio Shack, or SMD (Surface Mounted Device) LEDs, which are smaller and usually found on circuit boards. Does your receiver light up when you give it power? That’s an SMD LED at work. They’re tiny, and a pain in the arse to solder compared to your ‘bulbous’ types you’d find in LED flashlights. They both work the same way – they have a positive side (called the anode) and a negative side (called the cathode). They’re diodes, so current must flow the proper way to make them bring forth your righteous RC glory. On the standard ‘bulbous’ LED types, the positive node is usually the longer wire – this is to help you determine which terminal is negative and which is positive. As for the SMD devices, you’ll want to check the schematic of the device to make sure, it’s not always readily apparent. Some manufacturers have a small T on the bottom side of the LED – the top of the T is positive and the line points to the negative side, but that is not ALWAYS the case. Know your LED. If you’re not sure, or you don’t have documentation, use a multimeter and perform a diode test.
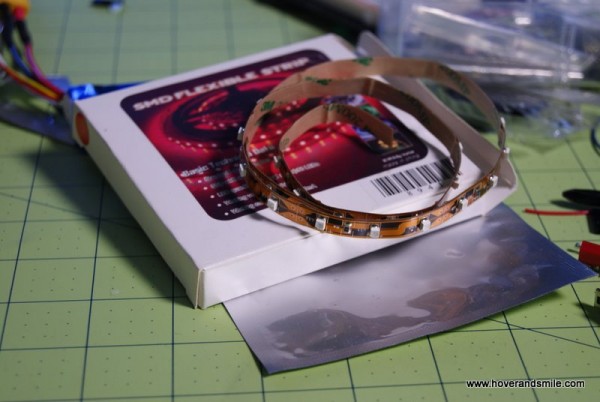
Strip LED kits. Generally come in lengths of one meter or less. Variants include waterproof versions, right angle LED versions (where the LED is facing off the side of the strip instead of upward from the strip), with varying colors and brightnesses. Generally work off of 12 volts, but can be powered with around 6 volts at a minimum. Work great with 3S Li-Po batteries, and well enough with 2S batteries.
Where to find them online? Search on Google and you’ll find a lot of sources. If you don’t mind the wait and shipping, I’ve used hobby king before, and they have the following colors available:
Other examples of vendors that sell strip lights (though at this time I’ve not used them) are Oznium and LED Lights World, as well as Super Bright LEDs.
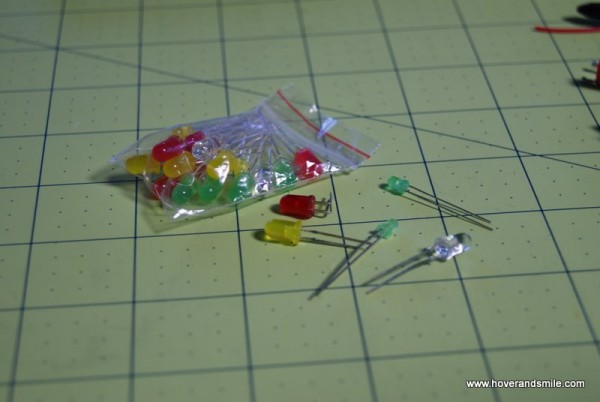
Your standard bulb type LED. Clearly not a kit, you must know how to create the circuit to power it on your own (We’ll help in this series).
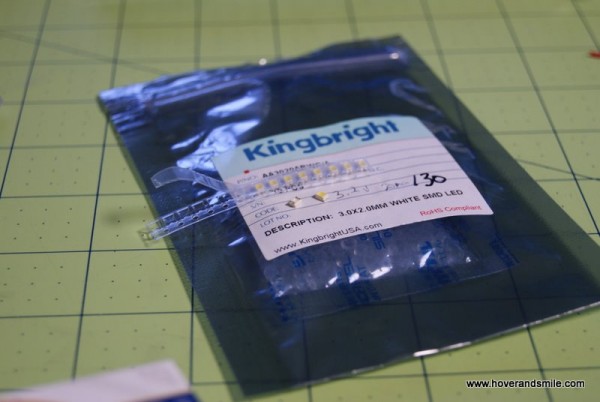
Where to get them? You can always buy single or paired packs at your local Radio Shack, if you’re looking for a couple here and there. If you’re really getting into wiring your own circuits, you may want to hit up electronics distributors online. I’ve usedKingbright USA in the past, but just like the strip lights, check out Oznium and LEDLights World, as well as Super Bright LEDs.
The SMD LED alone and waiting to be wired up. Just the same as the ones in the stripLED kits, but you can also buy single versions and wire them up in any configuration you like. I’ve used Kingbright USA LEDs as well as LEDs from Digikey, although digikey is more of a wholesale distributor, and really encompasses a lot more than just LEDs.
Sources of Light Emitting Diodes
You can buy individual or packages of LEDs at a local radio shack, or online hobby stores and electronics suppliers, see above for some examples. I’ve purchased LEDs at my local Radio Shack, SMD LEDs from KingBright USA and Digikey, and SMD strips from HobbyKing. There are plenty of deals and LED distributors online, have fun shopping!
You can buy individual LEDs that have different colors, brightness, viewing angles, etc. You can also buy premade kits with a specific number of LEDs that are not only meant to handle certain voltages from say a 9 volt battery or 12 volt LiPo battery, but also have all the resistors wired into the circuit – all you need to do is plug it in. No soldering or electronics knowledge required.
It’s the classic trade off – you can make any combination you desire but you’ll most likely have to wire your own circuit – or you can buy a kit and just live with what they have or make adjustments as you see fit.
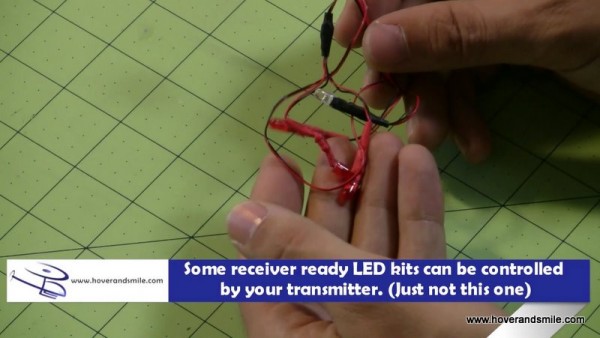
There are also kits that are meant for the RC hobby specifically – with ends that plug into your receiver for power – just like a servo would – and allow you to control the brightness or turn the LEDs on and off with just a transmitter switch. The LEDs typically have wires of a certain length, and standard colors for airplanes and helicopters.
Powering your circuit
Now that you have a kit, pre-wired circuit, or you’re creating your own LED spectacle, you’ll need to supply power to the circuit. You can use separate batteries, such as 3 volt keychain / watch batteries, 9 volt batteries, NiMH packs, etc. You can also power your circuit directly from your receiver, or the battery pack you use for your craft/receiver directly. Lots of choices, but also considerations for each solution.
Watch/Keychain Batteries
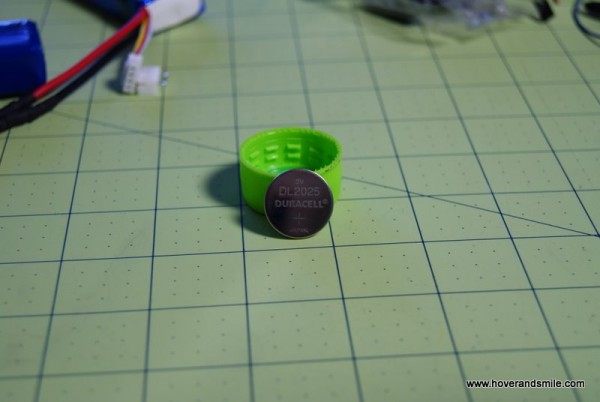
These little disc shaped batteries are easy to hook up to an LED. In fact, you just need a long standard LED and a rubber ring or tape to connect the LED nodes to your battery, and probably won’t even need a resistor to light your LED. An advantage here of course is that you could make a simple modular mount somewhere on your craft, say at the edge of a wing, place your LED and battery direct to your wing, and not have to worry about any separate wiring. Unfortunately, you can only power generally one LED from these batteries without handling some wiring yourself to make a parallel circuit, because the single battery voltage of 3 volts is less than the forward voltage of two LEDs in series. Also, given that the battery supplies only 3 volts, you may not be able to make brighter white and blue LEDs as bright as you’d like.
Extra Receiver Port
You can certainly power LEDs off of your receiver, if you watch how much current you’ll be pulling through your circuit and how much voltage your receiver provides. A lot of landing light kits will have the servo connector to pop right into an open port on your receiver. If you don’t have an open port, you can always try a servo cable Y-Adapter and tap into the positive and negative cables from the adapter, as typically you’re not using the signal cable for LED lighting. However – if it’s a kit that allows you to control the lights via your transmitter and you want that capability – you’ll need a dedicated channel on your receiver for your kit. Typically used as flaps or landing gear to toggle those on or off, as they’re mostly ‘static’ switches, full on or completely off. Be warned however – you really want to make sure you don’t pull a lot of milliamps through your circuit – because that’s going through the receiver. Look up the specs on your receiver to determine how much power it supplies through a port as well as the maximum current you’ll want to pull through – but don’t forget to take into account the milliamps used by your servos! There’s also a way around this – to still let you power your LEDs without your receiver power but still allow you to switch them on and off – that comes in a later part of our series!
I’ve seen others express opinions on receiver powered kits and radio interference caused by them. That’s about all I have as a disclaimer for you, and your mileage may vary with the type of receiver you’re using, but given that I’ve tried it myself and didn’t have any issues with it, I’d say just keep it in the back of your head if you experience oddities right after plugging a kit into your receiver. Do your range checks, be gentle on the first flights if you’re cautious enough.
Separate Battery Pack
Here’s an advantage from the power supply standpoint – a separate battery pack – similar to our watch/keychain batteries but with more power – say a 9 volt or 2-3 cell Li-Po. Supplying enough power to light multiple LEDs in series or LED strips, with the unfortunate note of adding weight to your craft. You can use small capacity Li-Po batteries to save weight – since LEDs don’t take a lot of current. You may certainly prefer this method to bypass taking precious ESC/BEC current away from your receiver and servos.
Tap Into Your Flight Battery Pack
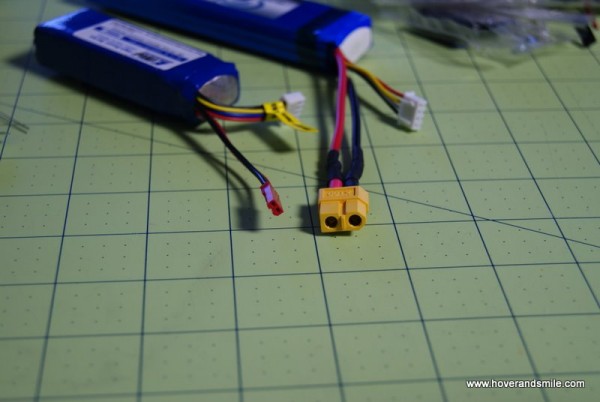
Since LEDs don’t take a lot of power – but this also depends on how many LEDs you’re using – you can tap into your flight battery pack itself. I personally like to tap into the balancing port on my Li-Po batteries. If you’re not using Li-Po batteries, simply build a Y-Connector and make a parallel line to both your flight electronics and your LEDcircuit. You can safely tap into your balancing charger cable for most LED lighting applications – the thinner wire for balancing handles most LED current needs.
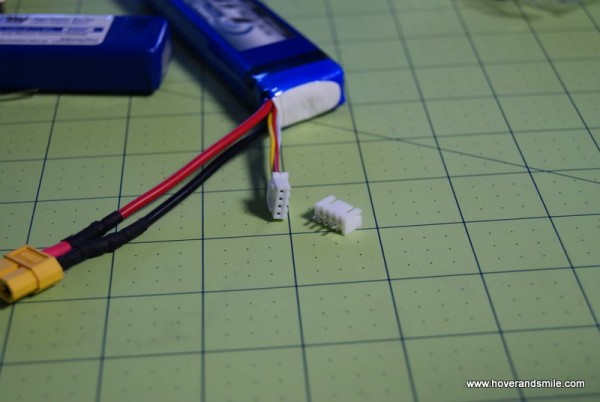
If you tap into the balancing port on your pack – you’ll need to buy the opposite female versions of your balancing plug to insure you can ‘plug in’ your lights for lighting, then remove it so you can still use the balancing plug on your battery for charging. You’re looking for either the plugs alone ( examples – packs from Digikey for3S Lipos and 2S Lipos ) or balancing cables that you can just cut ends off like here atRC Dude Hobbies , just match your battery’s balancing plug type. As far as which wires to use – use the two wires on the far end of your balancing plug. This will give you the full voltage of your Li-Po pack, whereas the center wires from the balancing plug are best left for the balancing charger to access individual cells.
This is the method I prefer – as I don’t pull a lot of current through the flight pack from my LEDs, and I don’t add weight from a separate battery. However – it means I have to do some more wiring.
I’ll be wiring a few different LEDs to this platform for demonstration’s sake. Our cast for this well-lit ensemble is as follows:
- LED SMD Strips – Flexible, with adhesive on the back. The strips take 12 volts, but will also light up on a 2S Li-Po (8.4 full charge) as long as a 3S (12.6 Full Charge) Li-Po. They’re wired in three LED segments – meaning you can cut the strips apart every 3 LEDs and still run each strip with 12 volts. This means they’re really a bunch of 3 series-wired LED groups wired in parallel. Resistors are included, so it’s really quite plug-and-play. These LEDS will be mounted along the side of the wing, the rudder, and the back of the control surfaces, all pointing outwards.
- Radio Shack White LEDs – These LEDs have a forward voltage of 3.3 volts and a forward current of 25 milliamps. They’re bright as heck, look like your old school standard LEDs, and will be used on the wing, pointing back towards the rudder to help actually light up the craft itself. The ‘spotlight’ will be a bit small based on the distance from the wing to the rudder, since the viewing angle is only 30 degrees. I’ll probably experiment with some light sanding of the LED itself to help diffuse the light. I’ll lose the spotlight, but gain a bit of viewing angle. At 7000 mcd brightness, they’ll have high visibility for night flying.
- Straw Lights – Taking some colored or white LEDs and placing them in the ends of clear straws, forming a cheap light tube as an example of making an LED strip of sorts without having to purchase a dedicated LED strip.
- Colored bottom lights – Mounting a few SMD LEDs on the bottom of the plane, pointing away from surface of the wing so they’re visible on the bottom side. Using red LEDs on the left wing and green LEDs on the right, with some whiteLEDs towards the back-end to help maintain orientation. This will cover a fairly easy way to solder the small little .
Switching it on and off, to remote, or not to remote?
That’s quite a bit of LED action, but the purpose is to demonstrate different types ofLED lighting techniques. I’ll be tapping into my Li-Po flight pack for power at first, directly connected manually so there will be no transmitter control. After that, we’ll go over using a Brushed ESC to make a transmitter controllable switch for the LEDs, simulating a typical receiver controllable switch you could buy separately. I don’t have one of those, so I’ll just use a small brushed ESC.

