Date posted: August 5, 2010
- Types of LEDS and Power Sources
- LED Characteristics and The Simple LED Circuit
- More Series LED Circuits
- Parallel LED Circuits
- LED Circuit Tools and LED Strip Kits
- Wiring Standard Bulb LEDs
- SMD LED Circuit Wiring
- LED Wiring and Current Check for Battery Power
- Placing your LED circuits on your RC Craft
- Remote Controlling your LED Circuit
- Painting With Flight
– Download Parallel LED Circuits as PDF –
Parallel LED Circuits
Keep in mind…
A single series circuit has limits
Remember your LED calculators from the last article!
If you can only light so many in series, how do you add more LEDs?
You can wire them in parallel. Parallel means that instead of wiring LED to LED, eachLED or small group of LEDs gets its own ‘line’ from the power source. You can combine this idea to make parallel wiring of LEDs in series to get past the forward voltage issue. In that case, you could use two resistors for two LEDs per parallel line, but the wiring is just a little different. You could also use three LEDs on one parallel line and a singleLED on a separate line. The point being – you have to keep the summation of your forward voltage of all LEDs in series on any ‘line’ less than your supply voltage, then add resistors accordingly. If you don’t, you’ll be right back in the same boat of having too many LEDs in one line and they won’t light up.
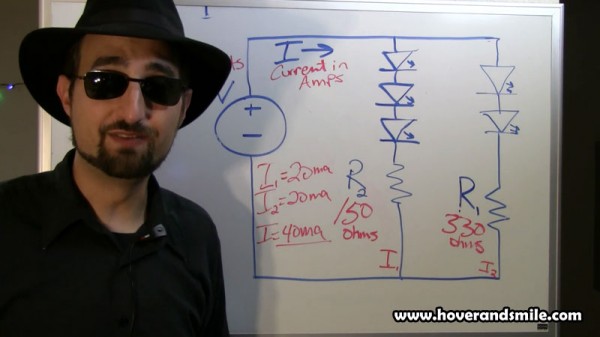
Parallel lines give you the same voltage as a single line did, but it does add to the total current drawn through your circuit. It gives real flexibility though, take a look at the following three pictures from the LED Wizard referenced above and see that you can wire 5 LEDs in at least three different ways!
Each of the above circuits work, but they’re not exactly the same. Look at the total current used for each circuit. The 5 LED circuit takes 100 milliamps, but the 2 line circuit only takes 40! The circuit is most efficient when you wire as many as you can in series, so I would actually wire up the first circuit if possible. It may not always be that way though based on your wiring and where you’re placing the LEDs, so you’ll have to consider that when planning your circuit.

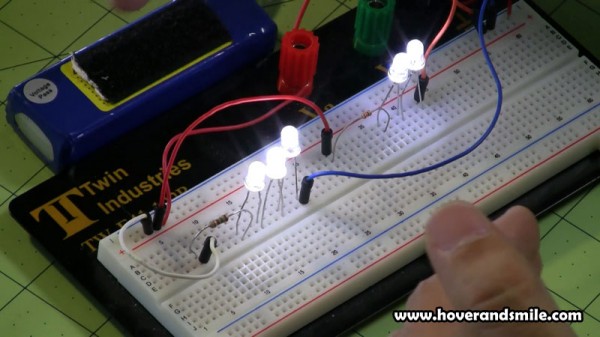
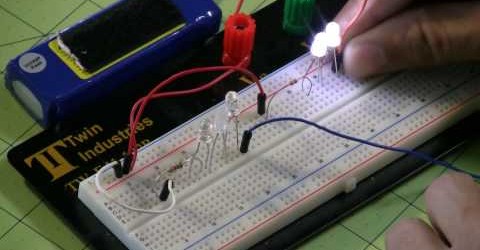
A practical example of circuit #1 wired up – 3 in series and 2 in series, each of those two ‘lines’ wired in parallel.
Wiring in parallel just means you have to split the positive lines and negative lines into multiple wires. Look at the diagrams and you can see we’re splitting the positive and negative ends to wire multiple series circuits together.

Vinnie shows off his artistic parallel wiring skills. He also paints beautiful stick figure portraits.
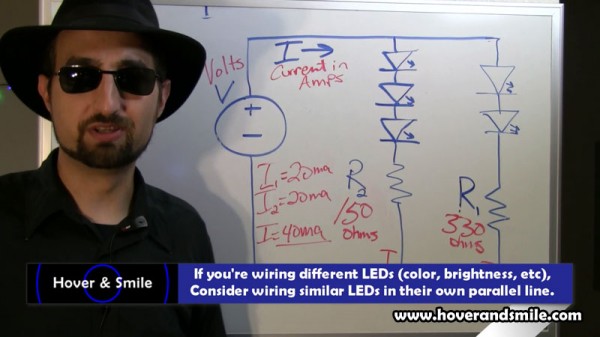
But what if you have two LEDs that take two different forward voltages? Best to wire common LED groups in parallel, which allows the current in each parallel line to be adjusted with different resistors for each LED’s requirements. You certainly don’t have to, but it helps keep resistors at the proper value for the different LEDs.
Don’t know the LED voltage or current?
What if you don’t know the values of the LED you’re using? Well, you’re on your own, and you could easily blow out the LED, but here are some general guidelines of values you can try in the LED calculators. Red and Green LEDs typically require less forward voltage than whites and blues, so try 2 to 2.5 volts. Whites and Blues can be targeted for around 3 – 4 volts. 20ma is a decent starter value for the current, which is measured in milliamps (.02 amps).


4 Comments
Scott
07/07/2011
Thanks for the video! I’m new to setting up circuts and I had a question. Why didnt you do a single string of LEDs with one resistor.
+ ——|>|——|>|——|>|——|>|——|>|——/\/\/—— +
Also, why do you place the resistor on the negative end? I’m guessing this doesnt matter?
I ask becasue I currently have a similair set up as above working. But I am worndering if maybe you did it the other way because it saves battery life better?
Eric Krystof
07/07/2011
Hi Scott,
The reason I didn’t use a single string of LEDs with one resistor was because in THIS example, I only had 12 volts, so if I wanted to say, light up 6 LEDs, they wouldn’t light because the sum of the LED forward voltage was GREATER than my 12 volt battery voltage. When this situation happens, you must use parallel circuits.
If I was only lighting up 1 or 2 LEDs with 12 volts, I wouldn’t have made a parallel circuit.
Try the LED calculators with examples of 12 volts incoming power, and 3 volts per LED, and choose 5 LEDs together. The calculator will require a parallel circuit. But, knock it down to 3 LEDs and it will use a regular series circuit.
As for the resistor being on the negative or positive side, for this simple circuit, as far as I know, there’s no real rhyme or reason. I’ve done it both ways, the important thing is LED polarity.
As far as battery power goes – if you can light up LEDs with as few parallel circuits as possible, you’ll save more power. Each parallel drop draws more current through your battery. However, it’s a balance issue – sometimes the circuit wiring works better for what you’re doing to drop a few parallel lines than having one series line going allllll the way across an airplane. The LED calculators I’ve referenced do a good job of telling you how much current each circuit example pulls.
If that doesn’t help, let me know!
johnny
05/09/2011
I had a question on the led light wires say you have 3negetives and 3 positive do you solder the 3 negative together the same with the positive to make one of each do you know what I mean instedx of having 3 wires of each do you just make it into one and just solder it to a balance connector
Eric Krystof
18/09/2011
Johnny,
If you’re making a series circuit, that is, all three LEDs in a row, you don’t need wires, you would just solder the negative leg of one LED to the positive of the next, negative of that one to the positive of the next, etc. Or you can use wires between them. I think what you’re asking about is a series circuit. That is perfectly fine, in fact, take a look at the series circuit video of my LED series and you’ll see what I mean.
However, I wouldn’t just take three LEDs in a row and solder directly into a balance connector without resistors. You should calculate any resistors you need depending on your power supply voltage of your (I’m assuming lipo) battery. I hope that helps.
No trackbacks yet.